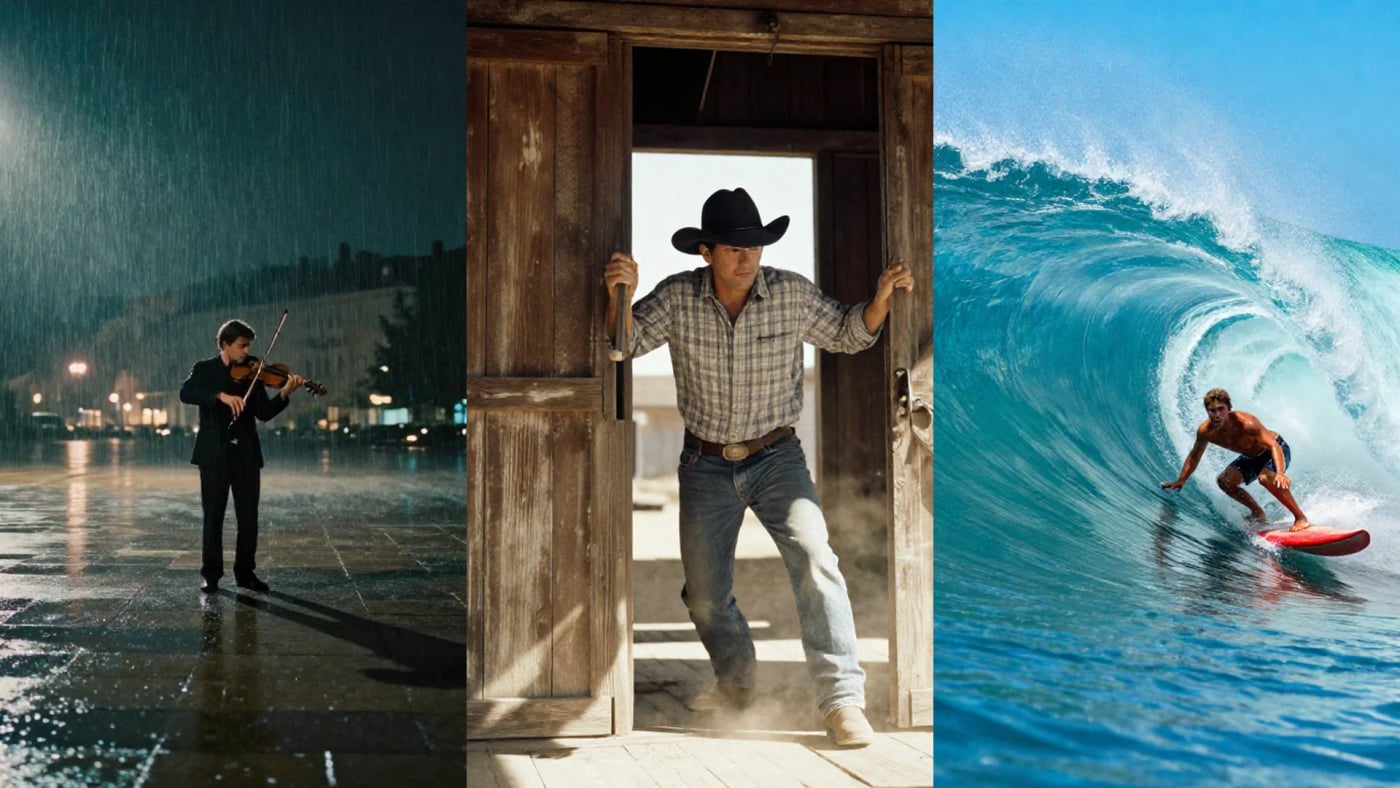
If you have ever written a prompt that said "cinematic" and got something that looked nothing like a film frame, this is for what that problem.
Cinema Controls adds a film DP's control layer directly to the Create Image tool. Three chips sit above the canvas at all times: Looks, Style, and Camera. Each one is optional, each one composes with the others, and together they give your prompt the exact visual language a director of photography would specify before a shoot.
<video src="https://kolbo-general-media.fra1.cdn.digitaloceanspaces.com/launch/cinema-controls/cinema-controls-16x9-v2.mp4" poster="https://kolbo-general-media.fra1.cdn.digitaloceanspaces.com/launch/cinema-controls/cover-16x9-v1.png" controls playsinline style="width:100%;border-radius:10px;display:block;margin-bottom:8px;"
Your browser does not support the video tag.
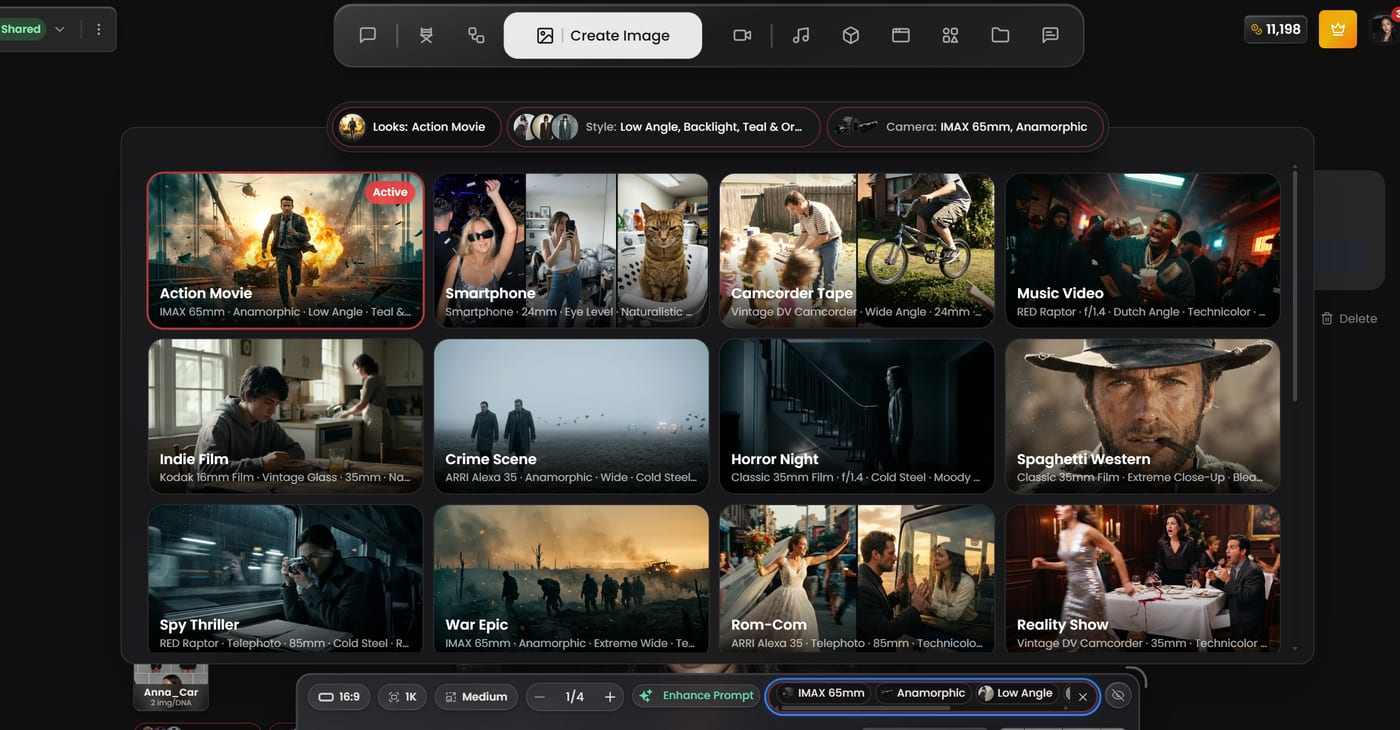 The Looks preset grid. Action Movie is active - IMAX 65mm, Anamorphic lens, Low Angle, Teal & Orange grade, all composed automatically.
Looks: One-Click Cinematic Presets
Looks are complete cinematography bundles. Pick one and the chip automatically selects a camera body, lens type, shot angle, lighting character, and color grade that belong together for that genre.
Twelve presets ship in the first release:
| Look | What it bundles |
|---|---|
| Action Movie | IMAX 65mm · Anamorphic · Low Angle · Teal & Orange |
| Smartphone | Smartphone · 24mm · Eye Level · Naturalistic |
| Camcorder Tape | Vintage DV Camcorder · Wide Angle · 24mm |
| Music Video | RED Raptor · f/1.4 · Dutch Angle · Technicolor |
| Indie Film | Kodak 16mm · Vintage Glass · 35mm · Naturalistic |
| Crime Scene | ARRI Alexa 35 · Anamorphic · Wide · Cold Steel |
| Horror Night | Classic 35mm Film · f/1.4 · Cold Steel · Moody Dark |
| Spaghetti Western | Classic 35mm Film · Extreme Close-Up · Bleach Bypass |
| Spy Thriller | RED Raptor · Telephoto · 85mm · Cold Steel |
| War Epic | IMAX 65mm · Anamorphic · Extreme Wide |
| Rom-Com | ARRI Alexa 35 · Telephoto · 85mm · Technicolor |
| Reality Show | Vintage DV Camcorder · 35mm · Technicolor |
Each preset thumbnail in the picker shows an actual generated image using those settings - no guessing what a look does before you apply it.
Style: Granular Control Over Angle, Light, and Color
If you want to compose your own recipe instead of using a preset, Style lets you set three dimensions independently.
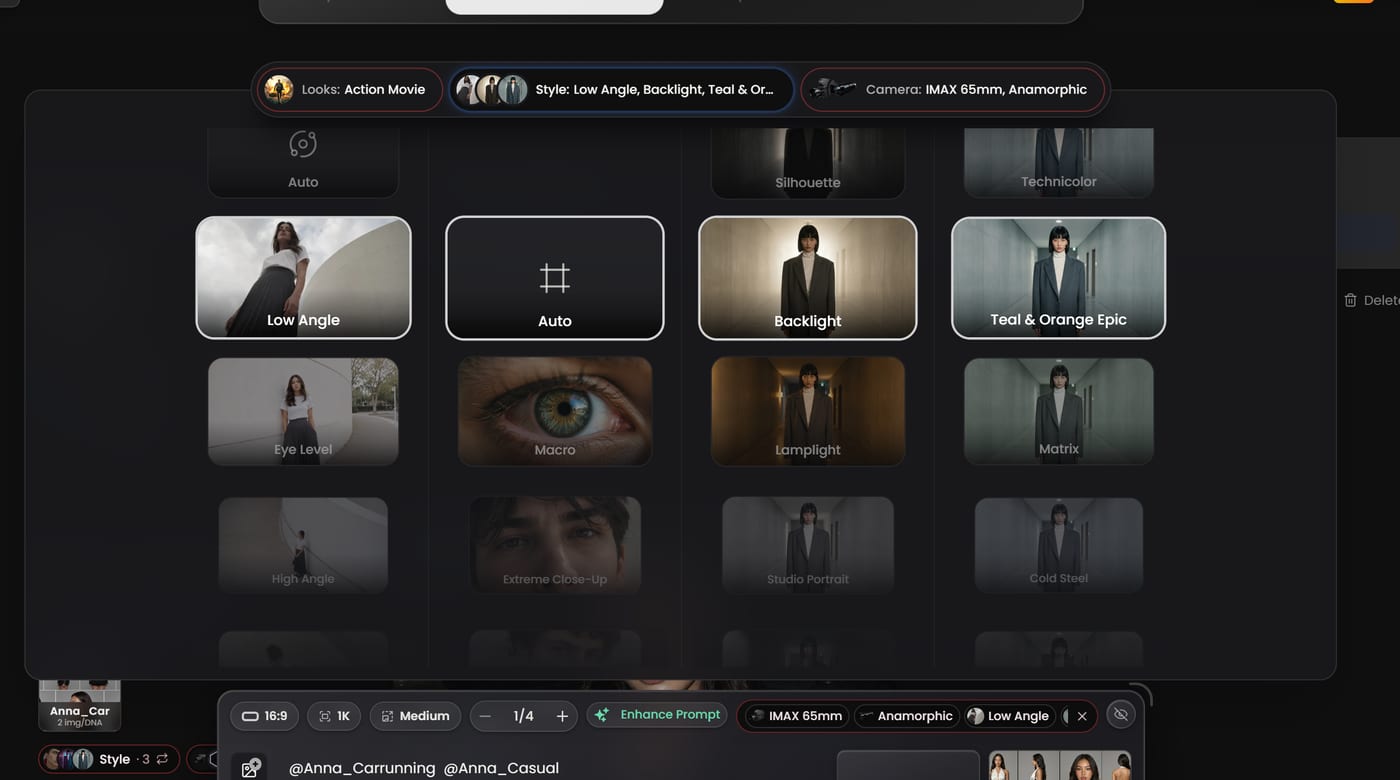 The Style panel. Low Angle, Backlight, and Teal & Orange Epic are active here. Each tile shows a generated reference so you know exactly what you are selecting.
Shot Angle - where the camera sits relative to the subject: Low Angle, Eye Level, High Angle, Macro, Extreme Close-Up, Studio Portrait
Lighting - the quality and direction of the key light: Backlight, Lamplight, Silhouette, Golden Hour, Neon Glow, Firelight, Hard Sun, Overcast, Candlelight, Window Light, Rim Light, Top Spotlight, Moody Dark
Color Grade - the final look applied to the frame: Teal & Orange Epic, Technicolor, Matrix, Cold Steel, Bleach Bypass, Classic B&W, Naturalistic Clean, Bleached Warm
Every tile in the Style picker shows a real generated image at that setting - not an icon. You see the difference between Lamplight and Firelight before you choose.
Camera: Real Gear, Real Rendering Differences
Camera lets you specify the actual hardware a film DP would call out on a shot list.
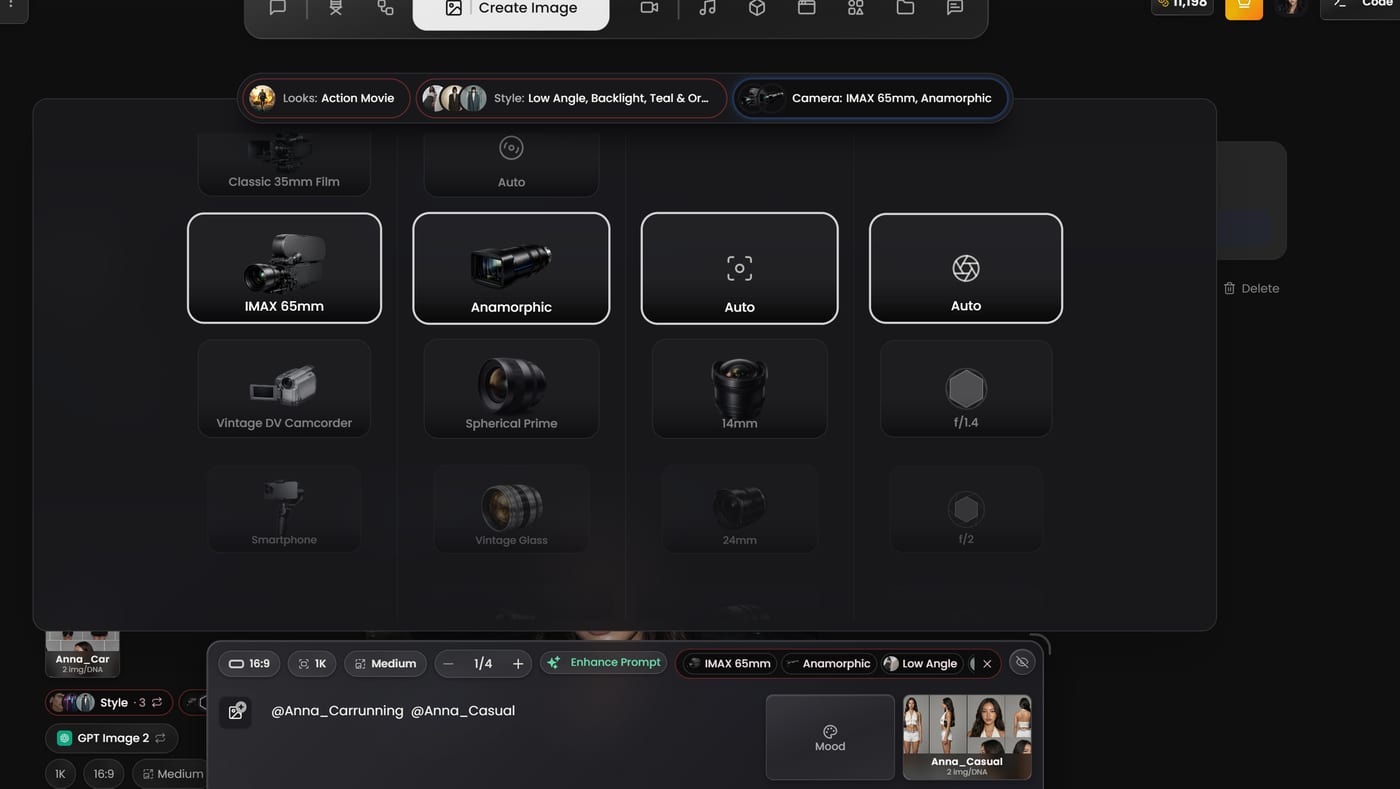 The Camera panel. IMAX 65mm body and Anamorphic lens are selected. Focal length and aperture are on Auto.
Camera body: IMAX 65mm, Classic 35mm Film, RED Raptor, ARRI Alexa 35, Vintage DV Camcorder, Smartphone
Lens: Anamorphic, Spherical Prime, Vintage Glass, Telephoto, Macro, Wide Angle
Focal length: 14mm, 24mm, 35mm, 85mm, 135mm
Aperture: f/1.4, f/2, f/8
Each of these changes how the AI renders the image - not just aesthetically but structurally. A 14mm Wide Angle gives barrel distortion and environmental context. A 135mm Telephoto compresses the background. An IMAX 65mm body produces fine, large-format grain and immense sharpness. An f/1.4 aperture produces razor-thin depth of field. These are not keyword filters. They translate into genuine optical characteristics in the output.
What It Looks Like in Practice
Here are three generations made with Cinema Controls, showing what the same kind of creative intent looks like when the gear changes.
IMAX 65mm · Lamplight · Teal & Orange Epic
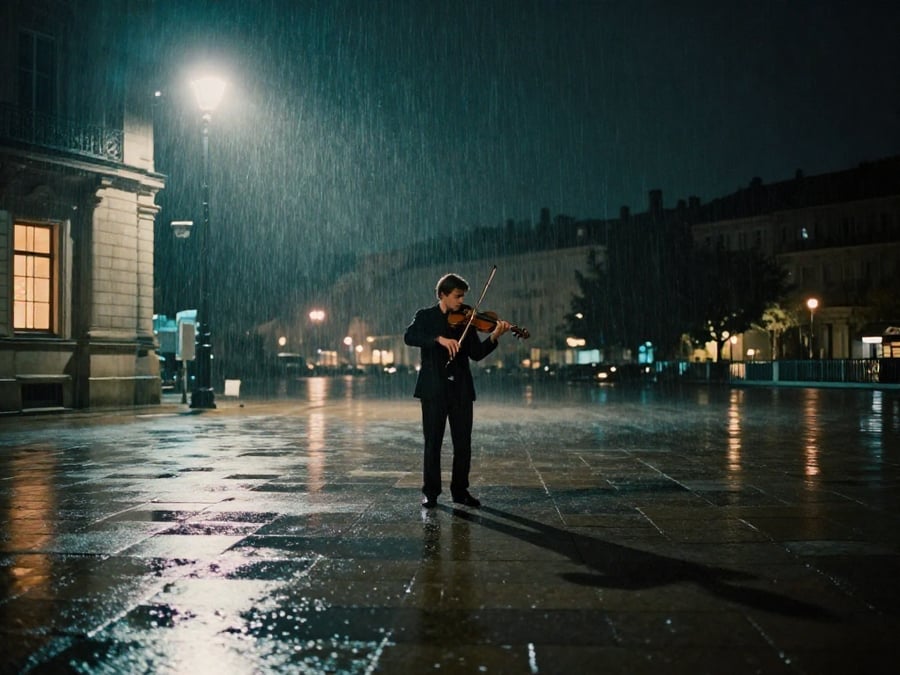 Prompt: "a violinist playing alone in an empty rainy plaza at night." IMAX 65mm for large-format sharpness and grain. Lamplight keeps the only light source practical - a street lamp, a nearby window. Teal & Orange gives the classic blockbuster grade to the wet-pavement reflections.
Dutch Angle · Neon Glow · Matrix
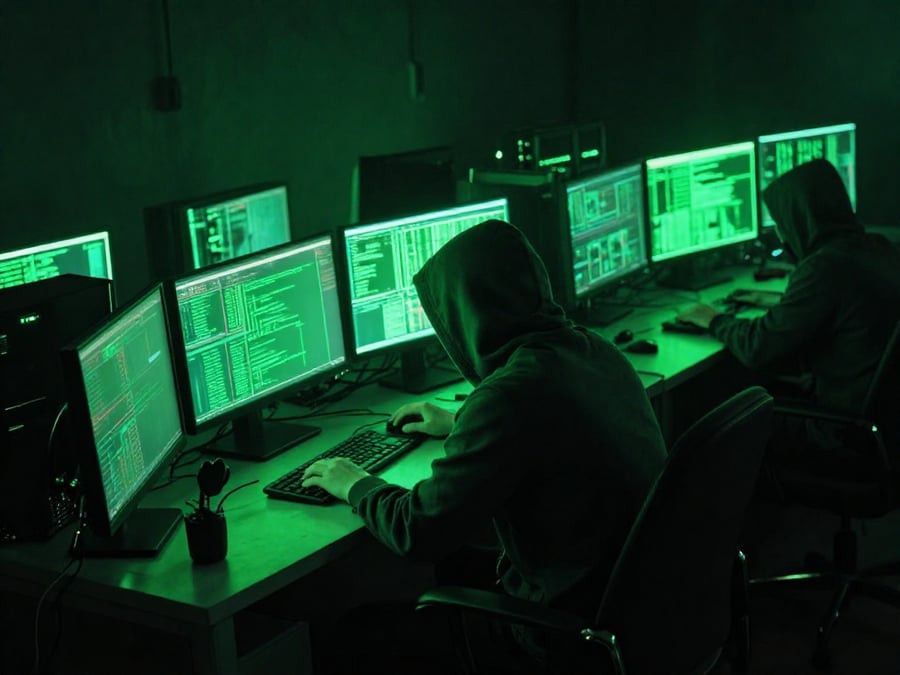 Prompt: "a hacker surrounded by monitors in a dark basement." Dutch Angle tilts the frame for unease. Neon Glow keeps the only illumination the screens themselves. Matrix locks the entire palette to phosphor green.
Low Angle · Golden Hour · Bleach Bypass
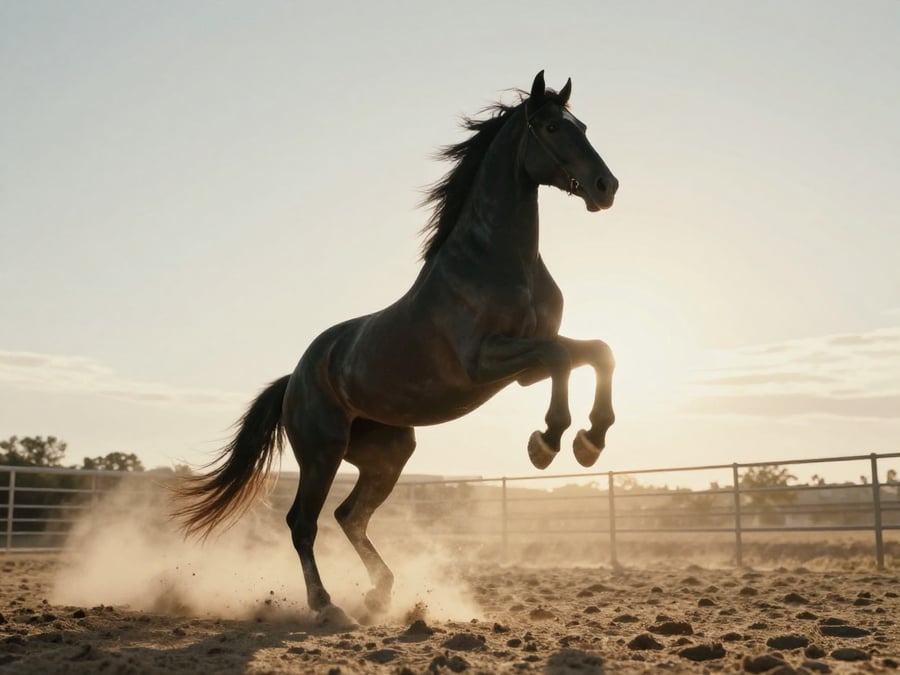 Prompt: "a black stallion rearing up in a dusty corral." Low Angle makes the stallion tower. Golden Hour rakes sunlight through the dust. Bleach Bypass desaturates into a gritty silver finish - the look of a Western shot on underexposed negative.
How It Works With the Rest of Kolbo
Cinema Controls compose with everything else in the Create Image tool:
- Visual DNA characters - add
@YourCharacterand the cinematic settings apply on top of the character's established look. A@Heroin an Action Movie look is not just cinematically framed - it is your specific character, shot that way. - All image models - the controls work across every model in the tool. The AI interprets the cinematography language regardless of which model is running.
- Any aspect ratio and resolution - 9:16 for social, 2.39:1 anamorphic, or any custom size. The controls do not constrain your format.
- Your own prompt - Cinema Controls do not replace your prompt. They add to it. The selections appear as chips in the prompt bar so you always see what is active, and you can override any individual chip at any time.
Try It
Cinema Controls is live now in the Create Image tool for all Kolbo.AI users.
Pick a Looks preset and run your next prompt. Then try breaking it apart with Style and Camera to see what each variable is doing. The controls are designed to teach cinematography by showing you, not by making you read about it.